

Hi community! I am Helmut Wagensonner, a customer engineer for Windows client OS at Microsoft. This blog is about getting back the source files of a Win32 app uploaded to Microsoft Intune.
Not long ago, I updated one of my tools (https://technet.blogs.ms/stayawake-updated/) and I wanted to add it as a new app package in my Intune test environment (further reading: https://docs.microsoft.com/en-us/mem/intune/apps/apps-win32-prepare). I can remember that I created a custom setup script for the old version but I couldn’t figure out where I copied it on my hard drive. So I needed to download the app files from Intune to get a copy of my script. But how? The Microsoft Endpoint Manager admin center does not provide an option to download the package source files. And even if I get this done, the content is still encrypted. So is there no way to get my application files back? Well, there is. And the charming part is that you don’t need any 3rd party tools.
The process is not very spectacular. You simply deploy the app to a test device and prevent the system from deleting the package files after deployment has finished. In conclusion:
- In Microsoft Intune deploy the software, which package source files you want to get back, to an Intune enrolled PC (I recommend using a test PC).
- As soon as the client starts to install the package, grab the files and backup them to a temporary directory.
But how does the deployment process work? Where are the necessary files located?
There is a good description on our docs pages, which explains the Win32 app installation process on a detailed level (https://docs.microsoft.com/en-us/troubleshoot/mem/intune/develop-deliver-working-win32-app-via-intune#detailed-flow-in-ime-logs). The interesting part is between step 15 and step 19, where these three steps are processed:
- Download
- Decryption
- Staging (unzipping)
In the first step the content is downloaded to the “downloading” directory (C:\Program Files (x86)\Microsoft Intune Management Extension\Content\Incoming). This directory contains an encrypted .bin file after the download has finished.
The second step can be confusing, so I don’t explain it in a very detailed level. The .bin file downloaded before is an encrypted ZIP package, which contains another encrypted ZIP package. The IME (Intune Management Extension) decrypts those files and copies the inner archive as an unencrypted .zip file to the “staging” directory (C:\Program Files (x86)\Microsoft Intune Management Extension\Content\Staging\<PackageID>).
This ZIP archive contains your Win32 application sources. In step three, the IME extracts the ZIP file to the “staged” directory (C:\Windows\IMECache\<PackageID>) and deletes the content from the download and staging directory, before it starts the installation of the Win32 app.
Right after the installation, IME also deletes the content from the “staged” directory and clears up everything.
Please note, that the staging and staged folders, referred in the following text, are different directories.
As you know now, the package source files are located on the hard drive for a short time. However, most probably the deletion process takes place before you can copy the files to another location. You need to interrupt the process after the decryption step or after the staging step. To do so, it’s good to know that all steps are executed by IME in Local System context. Denying Local System the right to delete or write files on one of the specified folders should prevent the application files from being deleted. Here are the options:
- You can interrupt the process right after the files have been decrypted to the “staging” directory. In that case you can get your application source files in a single .zip file.
- You can interrupt after the package sources have been unzipped to the “staged” directory, so you can easily pick a single file from the package.
I prefer the second method because it’s easier to clean up afterwards. However, I’m explaining both options in this blog.
First, prepare your environment. I don’t need to say that your device must be enrolled in Intune. The app you want to get back must be available for install in the Company Portal. If it is assigned as “required” only, you need to re-assign it to your device/user as “available” in the Endpoint Manager admin center. Also make sure that the detection rules do not result as “true”, if the app is already installed. In case of doubt, simply uninstall it.
Method 1: “The ZIP file”
Prohibit everyone to write to C:\Windows\IMECache.
- Open a command prompt with administrative rights.
- Enter following commands to deny write access to the “staged” directory
icacls C:\Windows\IMECache /save %temp%\ACLImeCache.txt
icacls C:\Windows\IMECache /deny *S-1-1-0:(WD,AD,DE,DC)
- In the Company Portal start the installation for the desired app.
- Wait until an “Installation failed” notification appears.
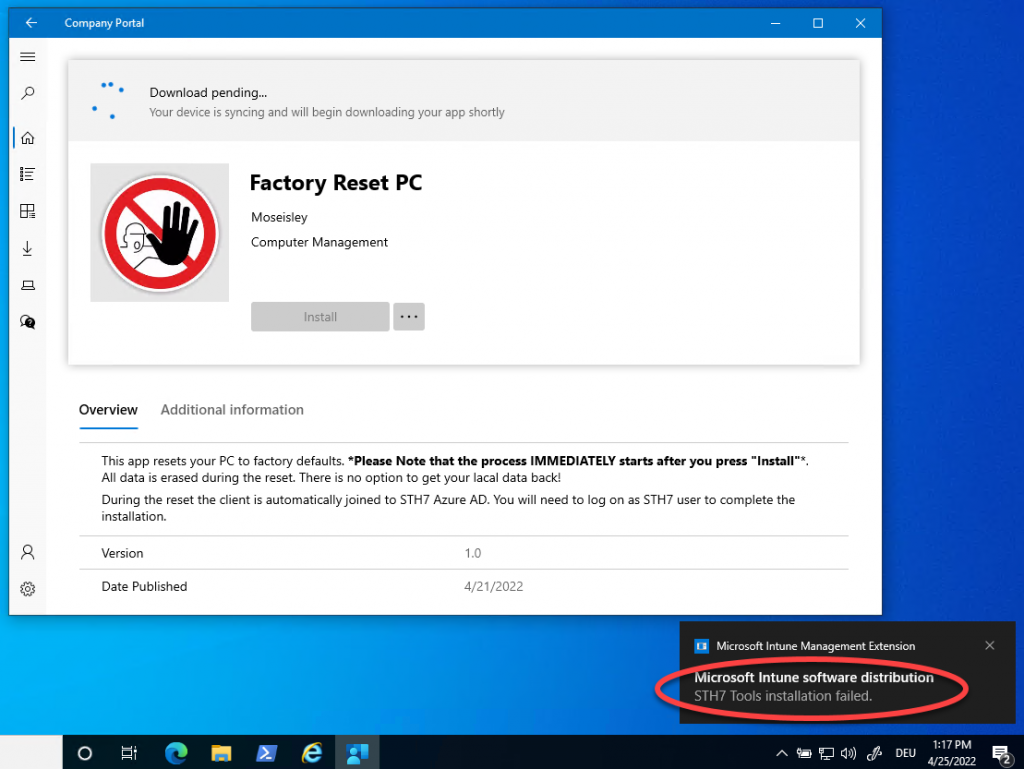
Note, in some of my tests the notification did not come up. You can always check the “staging” directory. There will be a subfolder with the package GUID after successful decryption. - Copy the content (ZIP file) from the “staging” directory.
- Restore the NTFS rights on the staged folder by running following command in the administrative command prompt.
icacls C:\Windows /restore %temp%\ACLImeCache.txt
- Delete the content in the staging area by running following commands in the administrative command prompt:
icacls "C:\Program Files (x86)\Microsoft Intune Management Extension\Content\Staging" /save %temp%\ACLStaging.txt icacls "C:\Program Files (x86)\Microsoft Intune Management Extension\Content\Staging" /grant *S-1-5-32-544:(OI)(CI)(IO)(F) for /f %i in ('dir /b /ad "C:\Program Files (x86)\Microsoft Intune Management Extension\Content\Staging"') do rd "C:\Program Files (x86)\Microsoft Intune Management Extension\Content\Staging\%i" /s /q - Restore the NTFS rights on the staging folder by running following command in the administrative command prompt.
icacls "C:\Program Files (x86)\Microsoft Intune Management Extension\Content" /restore %temp%\ACLStaging.txt
- In the Company Portal repeat the app installation to let IME clean up.
Method 2: “The extracted content”
Prevent the local System account from deleting files and folders from C:\Windows\IMECache.
- Open a command prompt with administrative rights.
- Enter following commands to deny delete rights to the “staged” directory
icacls C:\Windows\IMECache /save %temp%\ACLImeCache.txt
icacls C:\Windows\IMECache /deny *S-1-5-18:(CI)(D,DC)
- In the Company Portal start the installation for the desired app.
- Wait until an “Installation failed” notification appears.
Note, in some of my tests the notification did not come up. You can check the “staged” directory. There will be a subfolder with the package GUID after successful decryption. - Copy the content from the “staged” directory.
- Restore the NTFS rights on the staged folder by running following command in the administrative command prompt.
icacls C:\Windows /restore %temp%\ACLImeCache.txt
- In the Company Portal repeat the app installation to let IME clean up.
Generally, I suggest not to use a productive PC for this purpose. If possible, use a test client. Even if you restore permissions afterwards, changing ACE’s can always have side effects.